Cap Blue Green Deploy 


Blue-Green deployment solution for Capistrano, using symbolic links between releases.
Blue Green Concept
Learn more about Blue Green Deployment with Martin Fowler
Introduction
Cap Blue Green Deployment is a non canonical Blue Green solution, based on symlinks. Instead of having blue and green, we have pre and live. Pre is always validation environment and live it's production environment.
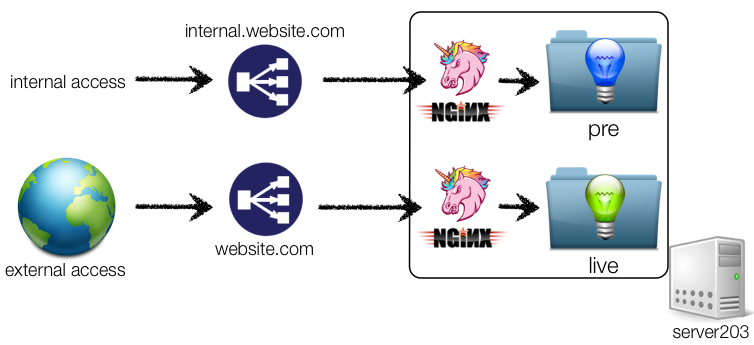
You can do as many deploys as you need to pre without affecting your live env. Changing symlinks you can easily put your code from validation to production environment.
Prerequisite
- Capistrano 2 (Capistrano 3 coming soon)
Installation
Add this line to your application's Gemfile:
gem 'cap_blue_green_deploy'
And then execute:
$ bundle
Or install it yourself as:
$ gem install cap_blue_green_deploy
And then, require the gem script under your capistrano configuration file (Capfile, deploy.rb, ...):
require 'cap_blue_green_deploy'
Usage
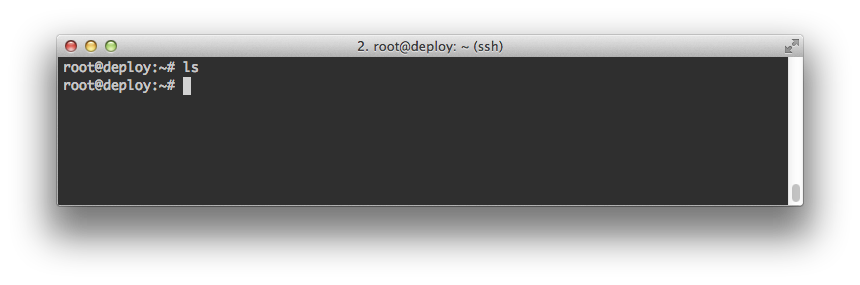
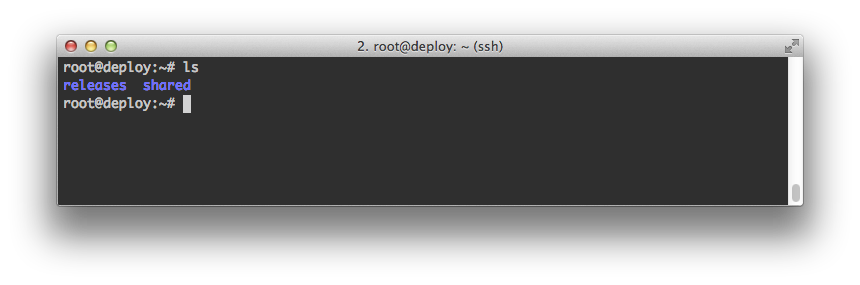
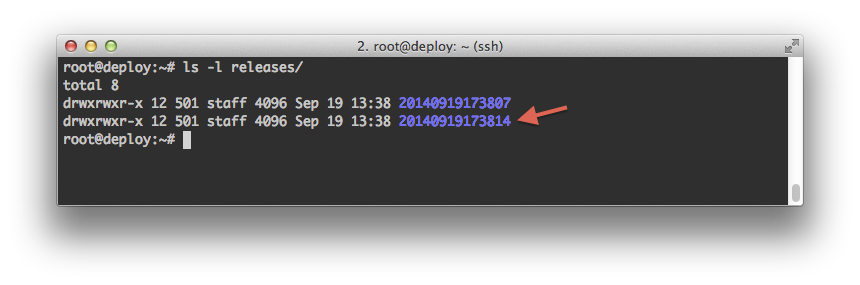
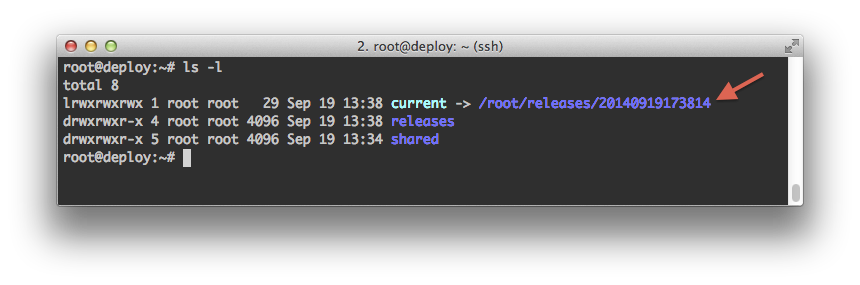
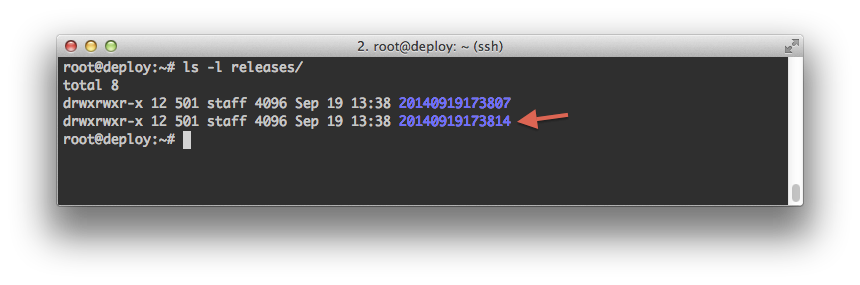
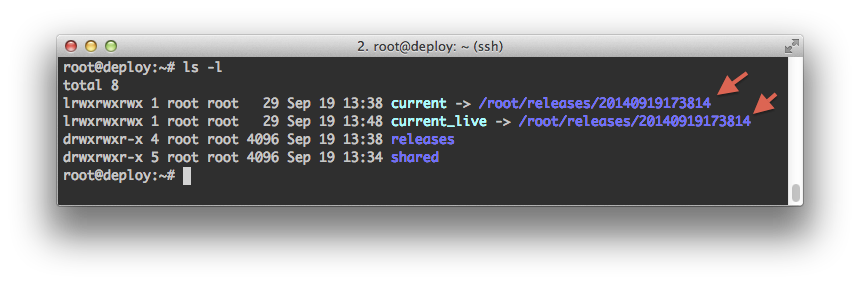
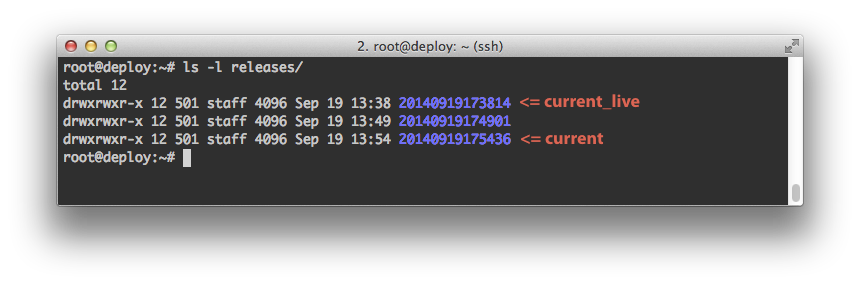
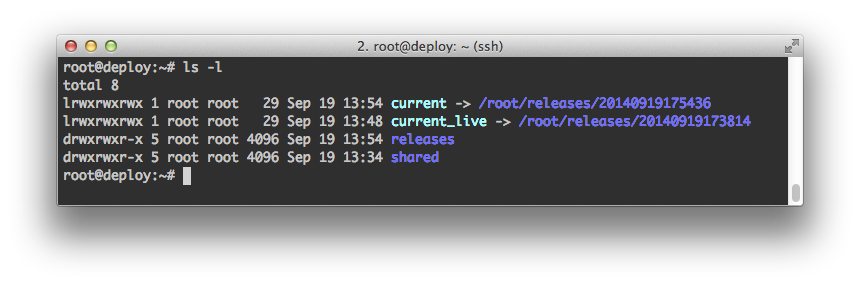
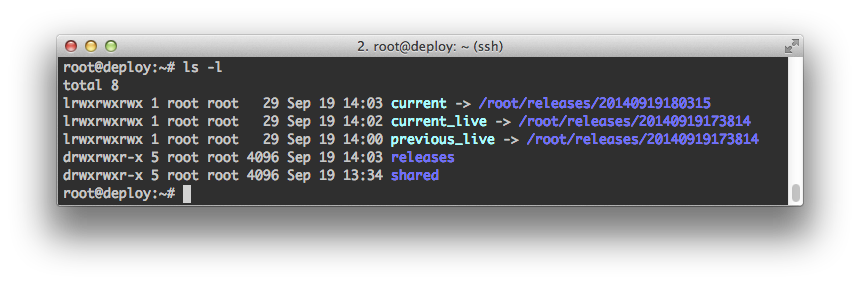
Understanding the deploy folder:
- current: Pre environment. Used to test and validate your application.
- current_live: Live environment. Your production access goes here. This dir name can be customized in custom variables, see below
- previous_live: Last live release. Used to do the rollback action of current_live. This dir name can be customized in custom variables, see below
Deploy Commands:
- Going to Pre
cap deploy:blue_green:pre
This command is an alias for cap deploy default task. It will run the deploy process and create the current release
- Going to Live
cap deploy:blue_green:live
This command will change symlinks of current_live dir to use the same release path of current dir. And also create the previous_live symlink to track the last current live release used.
- Rolling back
cap deploy:blue_green:rollback
This command will change the current_live symlink to use the same destination of previous_live symlink.
- Cleanup
cap deploy:blue_green:cleanup
This is the same behavior of the default capistrano cleanup deploy:cleanup, but the current, current_live and previous_live releases will be preserved and not removed.
This lib automatically rewrite the default deploy:cleanup to use this new cleanup function.
Don't forget that you need to add the cleanup callback manually in your capistrano file: after "deploy:update", "deploy:cleanup"
- Custom Variables
You can change the default values by overwriting them in your capistrano file. The default values are:
- keep_releases: 5
- blue_green_live_dir: "current_live"
- blue_green_previous_dir: "previous_live"
How to Play
Custom Variables used
set :keep_releases, 2set :blue_green_live_dir, "current_live"set :blue_green_previous_dir, "previous_live"
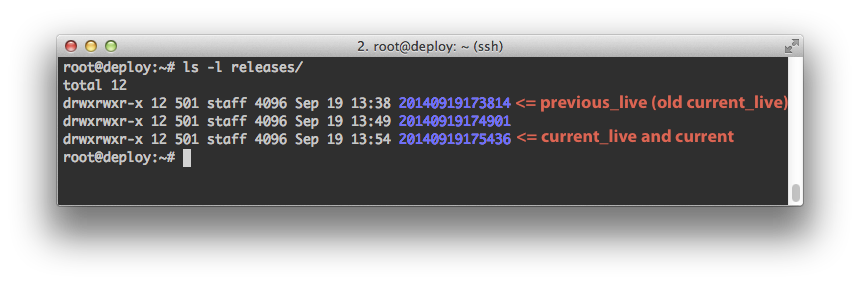
1. Starting with clean server
2. Running cap deploy:setup to prepare the server
3. Running cap deploy three times to populate the release folder (cleanup code removes one old release)
4. Going to live cap deploy:blue_green:live (current_live dir will be created. No changes in releases dir)
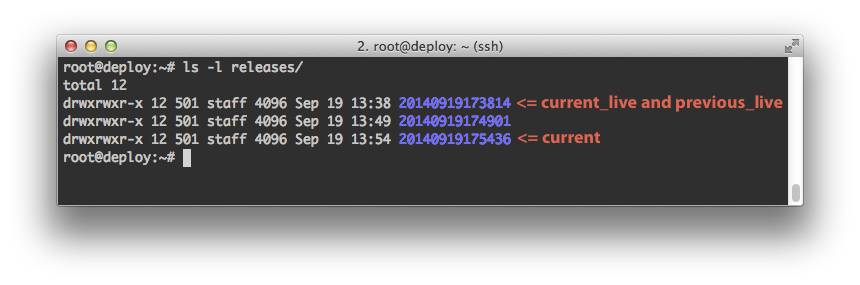
5. Running two more deploy with cap deploy (current_live will not change. Cleanup remove one old release.)
6. Going to live again with cap deploy:blue_green:live (At this time, previous_live will be created, targeting the current_live release before change it. No changes in releases dir)

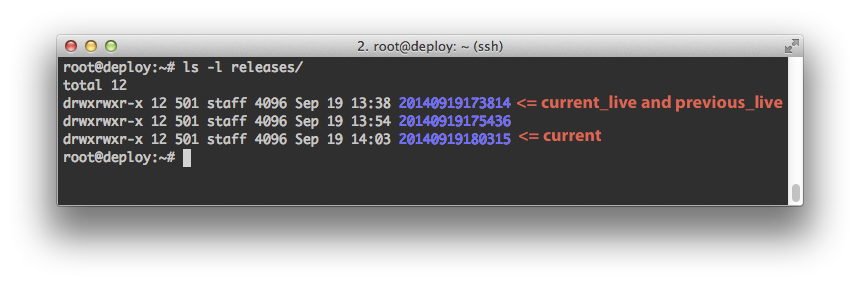
7. Something goes wrong... Rollbacking with cap deploy:blue_green:rollback (The current_live will change to target the same release of previous_live. No changes in releases dir)

8. Running one more deploy with cap deploy (current_live and previous_live will not change. Cleanup remove one old release.)*
9. Going to live again with cap deploy:blue_green:live

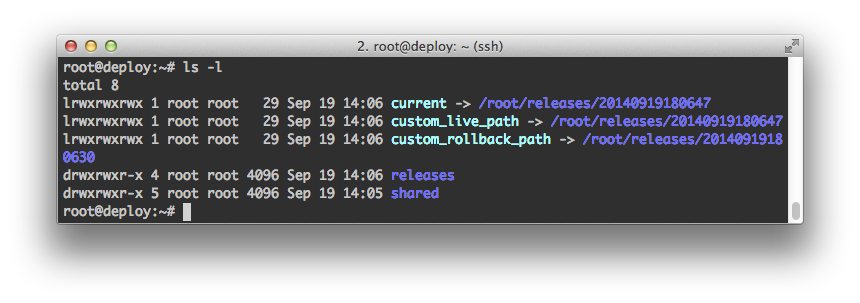
Changing current_live and previous_live variables to use custom names (custom_live_path, custom_rollback_path)
Contributors
Contributing
- Fork it
- Create your feature branch (
git checkout -b my-new-feature) - Commit your changes (
git commit -am 'Add some feature') - Push to the branch (
git push origin my-new-feature) - Create new Pull Request