Ban
Ban is a arduino firmware (based on firmata) that receives incoming remote control switch commands, infrared commands, door open/close signaling and can send out remote control commands also. Ban distributes all this information over a websocket. The Websocket protocol is described below:
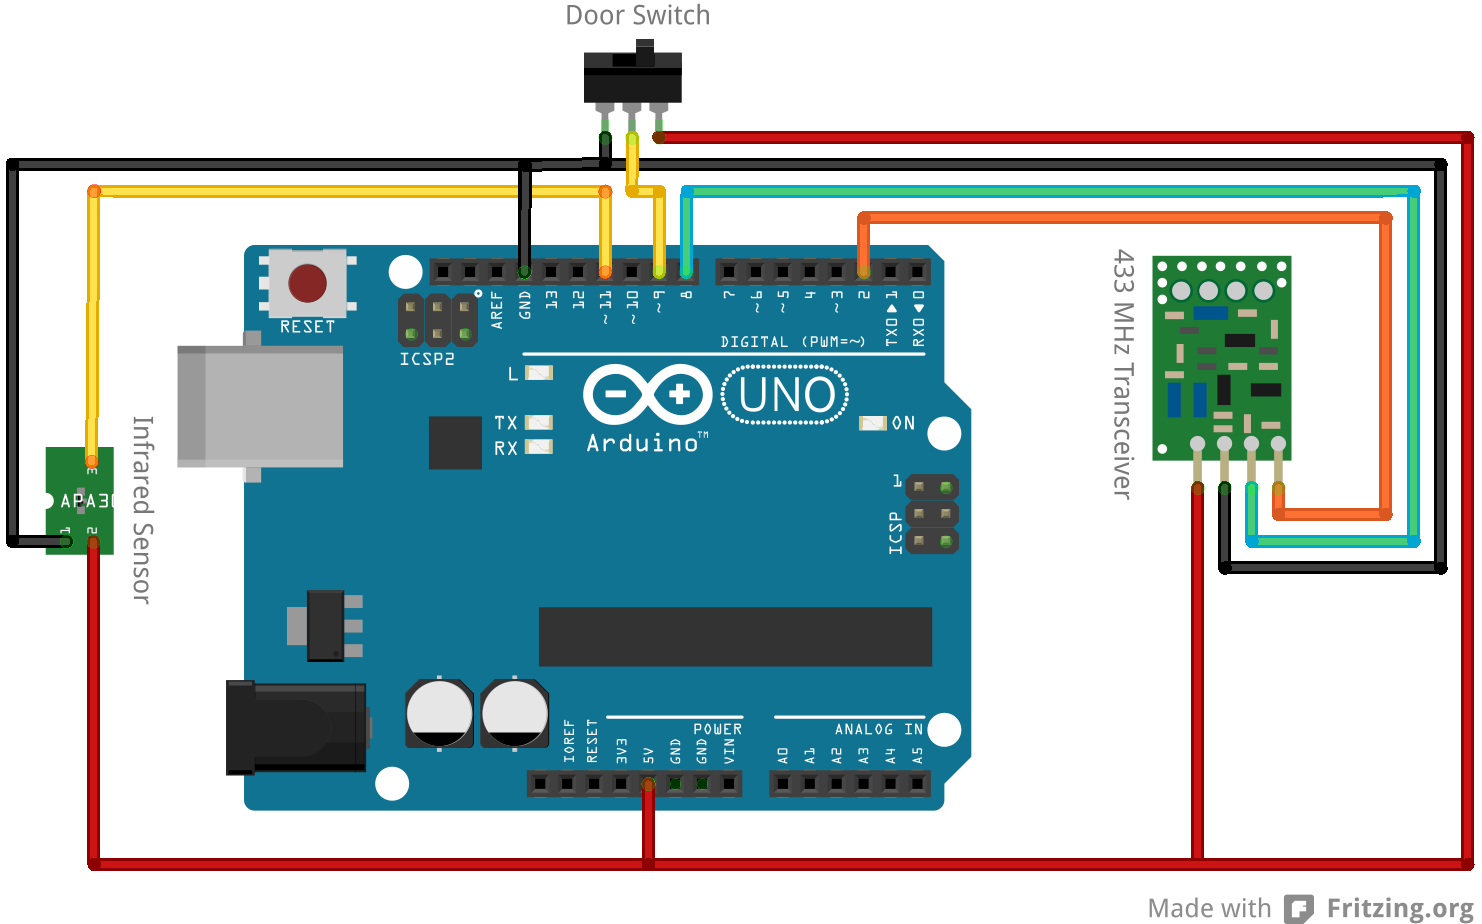
The Arduino Layout
Websocket Protocol
Basically the protocol has no authentication and is based on JSON.
Send messages
The following commands and there json representation are send by the ban server to all clients:
rc-turned-on
{ 'rc-turned-on': { 'decimal': 21780,
                    'bits': 24,
                    'binary': '000000000101010100010100',
                    'tristate': '0000FFFF0FF0',
                    'delay': 322,
                    'protocol': 1 } }
rc-turned-off
{ 'rc-turned-off': { 'decimal': 21780,
                     'bits': 24,
                     'binary': '000000000101010100010001',
                     'tristate': '0000FFFF0F0F',
                     'delay': 322,
                     'protocol': 1 } }
ir-received
{ 'ir-received': { 'code': 4294967295, 'hex': 'ffffffff' } }
door-opened
{ 'door-opened': { 'state': 'open' } }
door-closed
{ 'door-closed': { 'state': 'closed' } }
Received messages
The following commands can be send to the ban server:
rc-turn-off
{ 'rc-turn-off': { 'address': '11110D' } }
rc-turn-on
{ 'rc-turn-on': { 'address': '11110D' } }
Installation
Add this line to your application's Gemfile:
gem 'ban'
And then execute:
$ bundle
Or install it yourself as:
$ gem install ban
Flash the arduino
- Install the inotool
- Install the arduino library rc-switch
- Install the arduino library IRremote
- Fetch the git repository
- Configure the arduino board in the ino.ini file.
And build and upload the Firmware to your arduino. using
$ ino clean && ino build && ino upload
Usage
Start the ban server using:
$ ban server
Then by default a websocket server is started on the port 8080 on all interfaces. The websocket server will then send and receive the json messages.
Contributing
- Fork it
- Create your feature branch (
git checkout -b my-new-feature) - Commit your changes (
git commit -am 'Add some feature') - Push to the branch (
git push origin my-new-feature) - Create new Pull Request