jekyll-toc

![]()


Installation
Add jekyll-toc plugin in your site's Gemfile, and run bundle install.
gem 'jekyll-toc'
Add jekyll-toc to the gems: section in your site's _config.yml.
plugins:
  - jekyll-toc
NOTE: If you're using older Jekyll version(v3.4 or earlier), use gems instead of plugins.
Set toc: true in posts for which you want the TOC to appear.
---
layout: post
title: "Welcome to Jekyll!"
toc: true
---
Usage
There are three Liquid filters, which can be applied to HTML content,
e.g. the Liquid variable content available in Jekyll's templates.
1. Basic Usage
toc filter
Add the toc filter to your site's {{ content }} (e.g. _layouts/post.html).
{{ content | toc }}
This filter places the TOC directly above the content.
2. Advanced Usage
If you'd like separated TOC and content, you can use toc_only and inject_anchors filters.
toc_only filter
Generates the TOC itself as described below. Mostly useful in cases where the TOC should not be placed immediately above the content but at some other place of the page, i.e. an aside.
inject_anchors filter
Injects HTML anchors into the content without actually outputing the TOC itself. They are of the form:
<a id="heading11" class="anchor" href="#heading1-1" aria-hidden="true">
  <span class="octicon octicon-link"></span>
</a>
This is only useful when the TOC itself should be placed at some other
location with the toc_only filter.
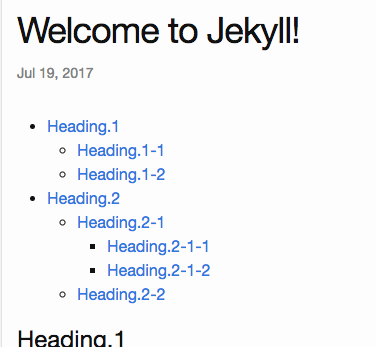
Generated HTML
jekyll-toc generates an unordered list. The HTML output is as follows.
<ul class="section-nav">
  <li class="toc-entry toc-h1"><a href="#heading1">Heading.1</a>
    <ul>
      <li class="toc-entry toc-h2"><a href="#heading1-1">Heading.1-1</a></li>
      <li class="toc-entry toc-h2"><a href="#heading1-2">Heading.1-2</a></li>
    </ul>
  </li>
  <li class="toc-entry toc-h1"><a href="#heading2">Heading.2</a>
    <ul>
      <li class="toc-entry toc-h2"><a href="#heading2-1">Heading.2-1</a>
        <ul>
          <li class="toc-entry toc-h3"><a href="#heading2-1-1">Heading.2-1-1</a></li>
          <li class="toc-entry toc-h3"><a href="#heading2-1-2">Heading.2-1-2</a></li>
        </ul>
      </li>
      <li class="toc-entry toc-h2"><a href="#heading2-2">Heading.2-2</a></li>
    </ul>
  </li>
</ul>
It looks like the image below.
Customization
TOC level
The toc levels can be configured on _config.yml.
toc:
  min_level: 2 # default: 1
  max_level: 5 # default: 6
The default level range is <h1> to <h6>.
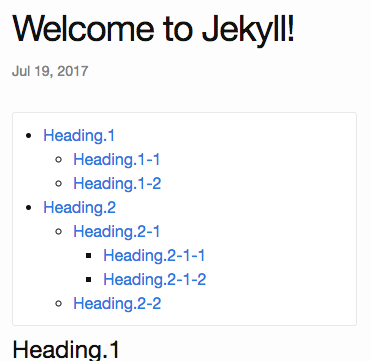
CSS Styling
The toc can be modified with CSS. The sample CSS is the following.
.section-nav {
  background-color: #FFF;
  margin: 5px 0;
  padding: 10px 30px;
  border: 1px solid #E8E8E8;
  border-radius: 3px;
}
Each TOC li entry has two CSS classes for further styling.
The general toc-entry is applied to all li elements in the ul.section-nav.
Depending on the heading level each specific entry refers to, it has a second CSS class toc-XX, where XX is the HTML heading tag name. For example, the TOC entry linking to a heading <h1>...</h1> (a single
# in Markdown) will get the CSS class toc-h1.