
Beez
Simple, efficient ruby workers for Zeebe.
![]()
Features • Disclaimer • Getting Started • Usage • Configuration • Example • License • Credits
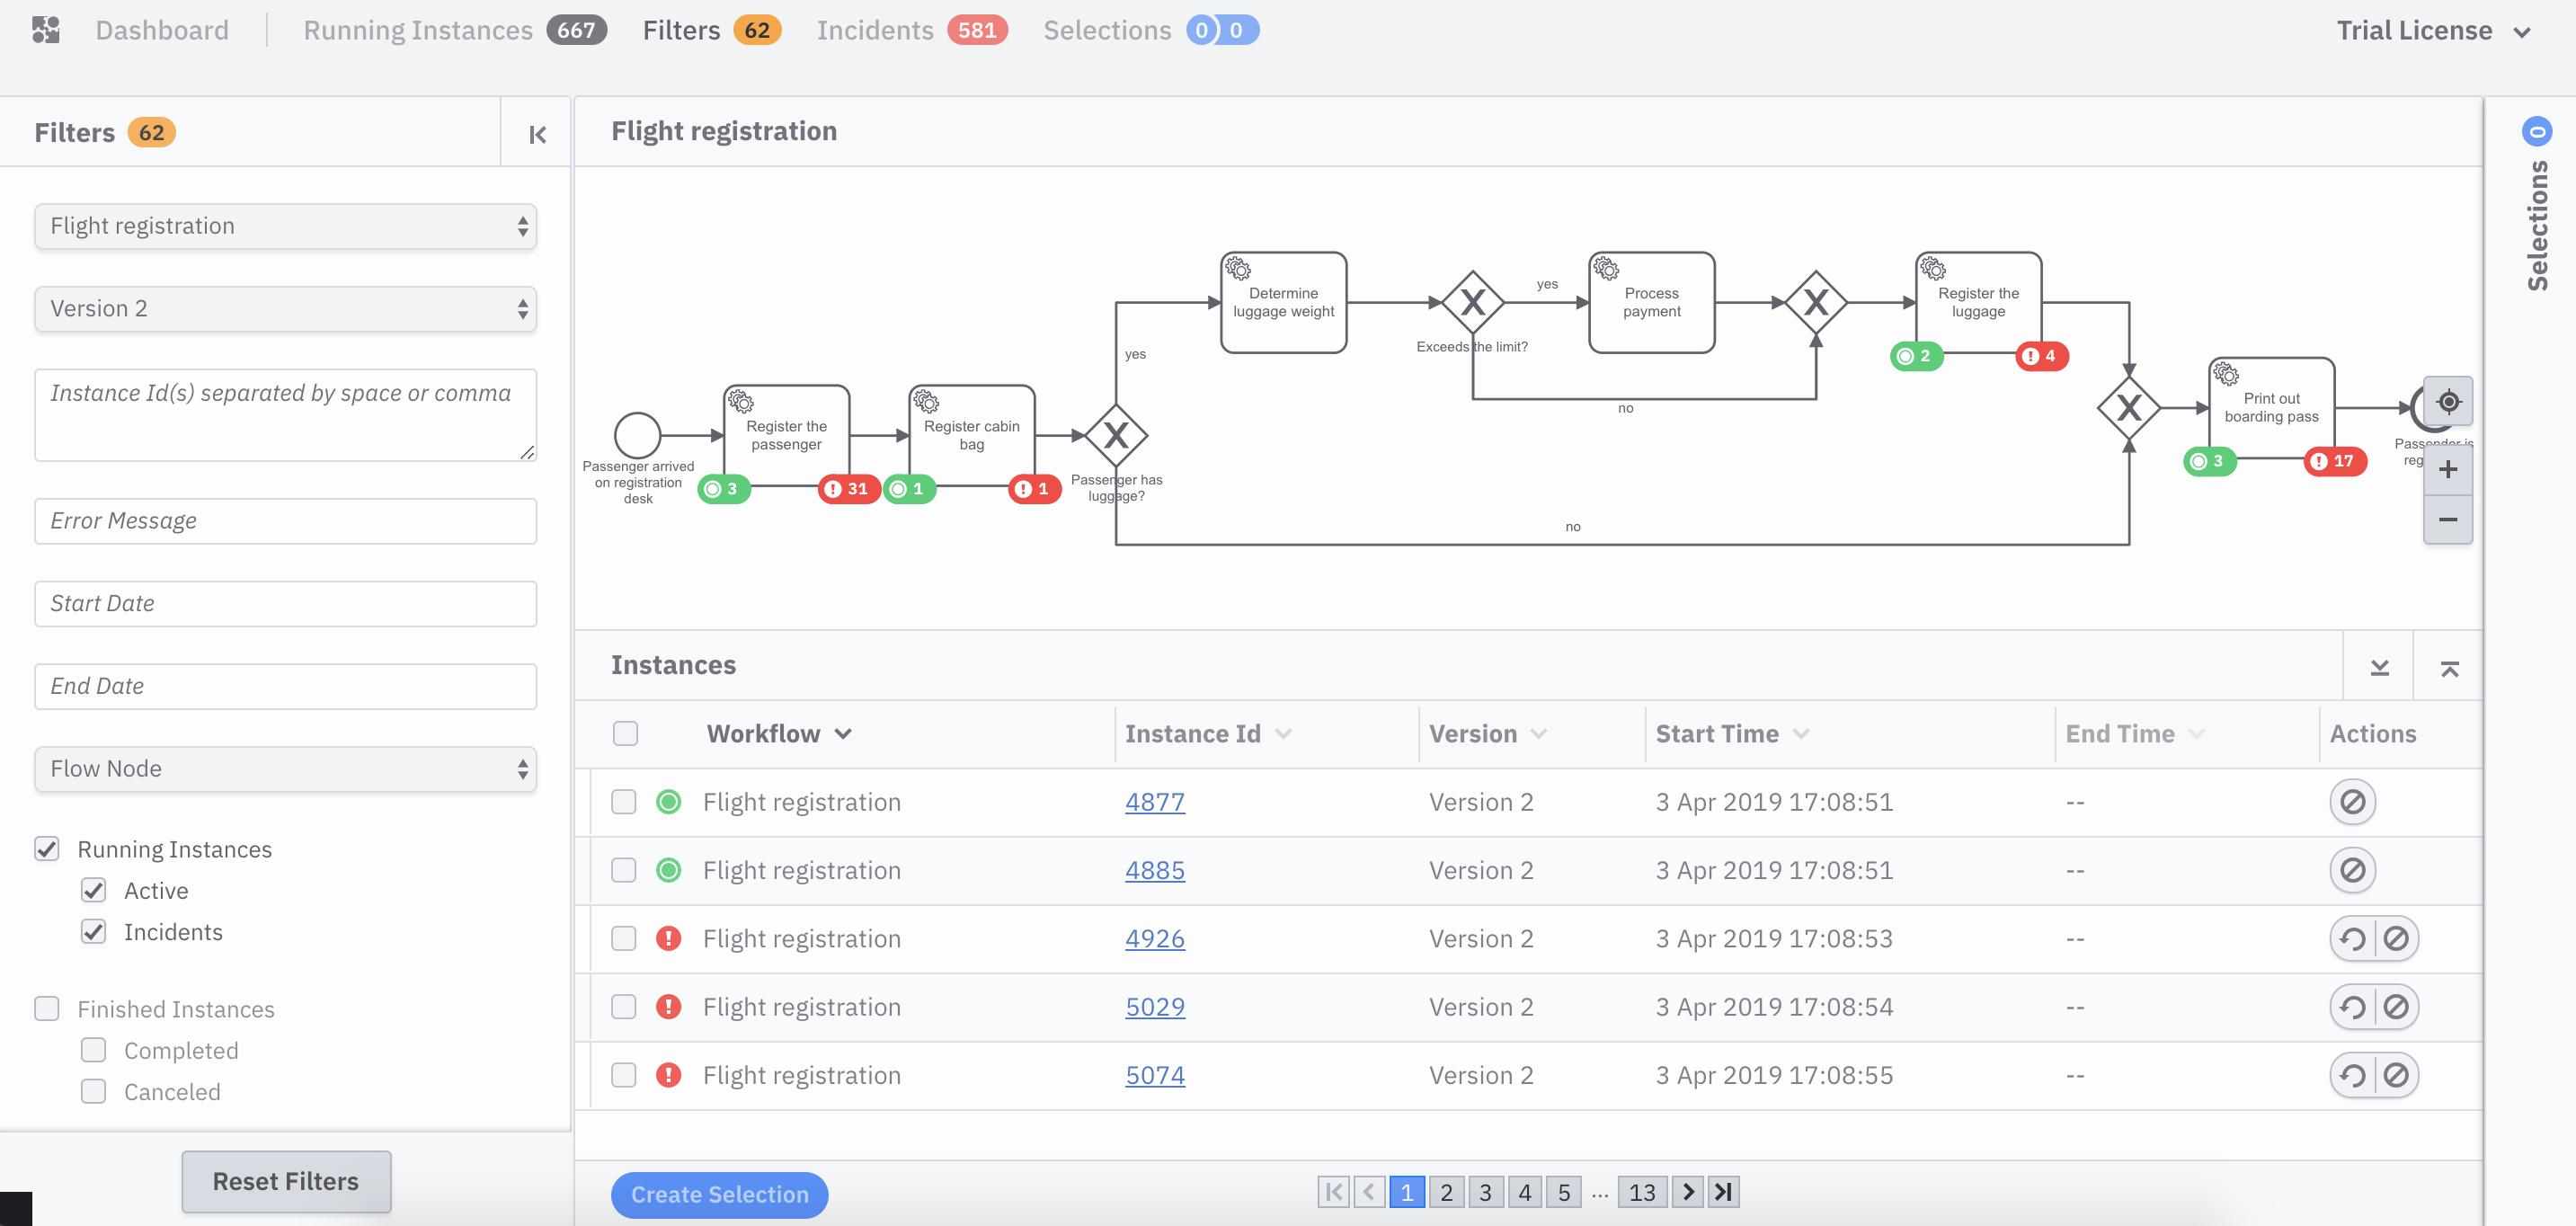 Beez lets you consume Zeebe workflows like this one!
Features ✨
- Beez integrates with Zeebe, a free and source-available workflow engine for microservices orchestration
- Beez integrates with you Rails application
- Beez runs your workers asynchronously
- Beez automatically marks your jobs as failures uppon Ruby exceptions
- Beez has very few dependencies
Disclaimer ⚠️
- Beez is currently a pre-release
- Beez has currently not being tested in production
- Beez is currently lacking unit tests, any help is welcome!
Getting Started 🎓
These instructions will help you get started with Zeebe and Beez. Zeebe already provides an extensive documentation I highly suggest you to check it out before.
Prerequisites ☔️
- You need Zeebe up and running
- Ruby >= 2.5 & < 2.7
- Rails >= 4 (optional)
How It Works ⚙️
Workflows are flowchart-like blueprints that define the orchestration of tasks. Every task represents a piece of business logic such that the ordered execution produces a meaningful result.
Beez lets you define job workers as Ruby classes which is your implementation of the business logic required to complete a task.
Running a workflow then requires two steps:
- Submitting the workflow to Zeebe
- Creating job workers that can request jobs from Zeebe and complete them
Installation ☕️
Add this line to your application's Gemfile:
gem 'beez', '~> 0.1'
And then execute:
$ bundle
Or install it yourself as:
$ gem install beez
Usage 🎆
Let's start by creating some workers. In your Rails application, those would be
defined under app/jobs or app/workers for example.
class MyWorker
  include ::Beez::Worker

  type "service-task-name"
  max_jobs_to_activate 5 # optional, default to 1
  poll_interval 1 # optional, default to 5
  timeout 30 # optional, default to 30

  def process(job)
    # do something
  end
end
Each worker automatically polls for new jobs at poll_interval interval. They
are configured to accepts a max_jobs_to_activate jobs at the same time.
Workers have exactly timeout seconds to process the job before the broker
consider it as expired and schedule it to another worker.
The process instance method receives a job instance which holds the job's
attributes such as the variables the job received. You can get the complete
list of attributes available here
Assuming you have Zeebe up and running, simply start Beez from the root of your Rails application:
bundle exec beez
That's it.
Configuration 🔧
Beez comes configured with global sane defaults but you can always
overrides them using either env variables in some cases or the configure
block:
# Here are the global defaults already configured for you
Beez.configure do |config|
  config.env = ENV["APP_ENV"] || ENV["RAILS_ENV"] || ENV["RACK_ENV"] || "development"
  config.logger = Logger.new($stdout)
  config.require = "."
  config.timeout = 30
  config.zeebe_url = ENV['ZEEBE_URL'] || 'localhost:26500'
end
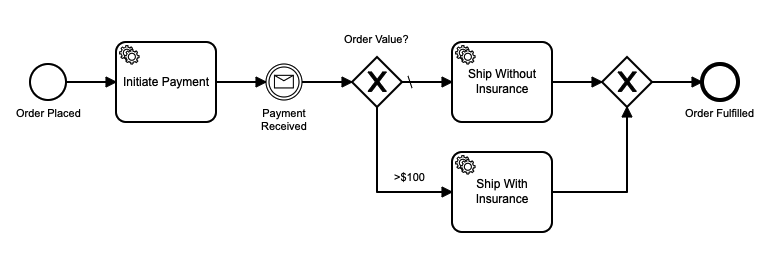
Example 📘
Let's get the full picture by deploying a dummy Order Process workflow to Zeebe and define simple workers as plain Ruby objects.
- Start Zeebe and Zeebe Operate:
git clone https://github.com/camunda-cloud/camunda-cloud-get-started/
docker-compose up
- Head to http://localhost:8080
- Login:
demo - Password:
demo
- Start Beez using our example workers located at
examples/workers.rb:
beez --timeout 5 --require ./examples/workers.rb
- Start an
irbsession:
irb -r beez
- Interact with Zeebe directly from the gem:
2.6.6 :001 > # Deploy a process to Zeebe
2.6.6 :002 > Beez.client.deploy_process(processes: [name: "order-process", definition: File.read('/path/to/beez/bpmn/order-process.bpmn')])
2.6.6 :003 > # Create a new instance of this process
2.6.6 :004 > Beez.client.create_process_instance(bpmnProcessId: "order-process", version: 1, variables: { orderId: "1234", orderValue: 94 }.to_json)
2.6.6 :005 > # Watch Beez automatically executing the first task!
2.6.6 :006 > # Publish a business message to simulate a payment received event
2.6.6 :007 > Beez.client.publish_message(name: "payment-received", correlationKey: "1234")
That's it!
Check out all the available commands in lib/beez/client.rb.
Development
After checking out the repo, run bin/setup to install dependencies. Then, run rake spec to run the tests. You can also run bin/console for an interactive prompt that will allow you to experiment.
To install this gem onto your local machine, run bundle exec rake install. To release a new version, update the version number in version.rb, and then run bundle exec rake release, which will create a git tag for the version, push git commits and tags, and push the .gem file to rubygems.org.
Contributing 🤝
Bug reports and pull requests are welcome on GitHub at https://github.com/gottfrois/beez.
License 📜
The gem is available as open source under the terms of the MIT License.
Credits 👏
- The Sidekiq authors and contributors for their inspirational codebase which helped me to build this gem
- Logo vector created by raftel - www.freepik.com